Beperken van kosten door ontwerpfouten? Onduidelijkheid voor en tijdens de bouwfase hoe de installatiedoorvoeringen brandwerend af te dichten?
Met behulp van de Mulcol Projectmanager maakt u uw project uniek. Om kostenbesparend te werken maakt u in ontwerpfase een overzichtelijk Projectboek aan, voorzien van afgesneden details en relevante gegevens voor alle brandwerende afdichtingen op uw bouwproject. Brandwerende oplossingen uit de Multiselector, bijbehorende certificaten en offertes voegt u eenvoudig samen tot één bestand. U kunt het Projectboek direct versturen via e-mail of downloaden als pdf bestand. Zo geeft u uw opdrachtgever direct een duidelijk inzicht hoe u het gebouw van de juiste brandwerende producten en oplossingen voorziet in combinatie met toegepaste installaties bij brandwerende constructies, zoals wanden en vloeren.
Dit noemen wij: "Brandwerend detailleren in ontwerpfase"
Projectboek aanmaken
U kunt het Projectboek helemaal indelen en opmaken zoals u dat zelf wilt. U heeft de keuze in kleuren, een bedrijfslogo toevoegen en eventueel een projectafbeelding. Zorg er wel voor dat de bedrijfsgegevens kloppen, want deze worden automatisch meegenomen in het Projectboek. Om uw bedrijfsgegevens aan te passen gaat u naar ‘Account’ in het hoofdmenu van de Datamanager.
Algemene instellingen
Onder de tab ‘Algemene instellingen’ geeft u de naam van het Projectboek aan en eventueel een korte beschrijving waaronder u het Projectboek wil archiveren. De tekstkleur die wordt gebruikt in het Projectboek en de kleuren van de headers kunt u naar wens aanpassen.
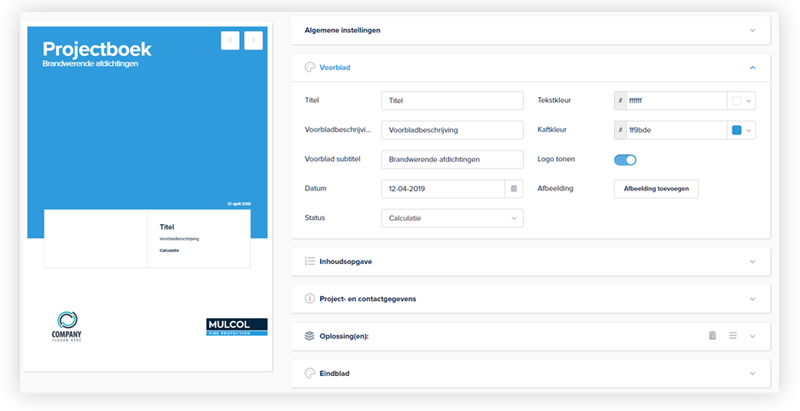
Voorblad
Links in beeld ziet u direct hoe het voorblad van het Projectboek eruit komt te zien met de ingevoerde gegevens en opmaak. U kunt ervoor kiezen uw bedrijfslogo te tonen, dat u heeft geüpload bij bedrijfsgegevens in het hoofdaccount. Heeft u een afbeelding van het project? Voeg deze dan gemakkelijk toe via de button ‘Afbeelding toevoegen’.
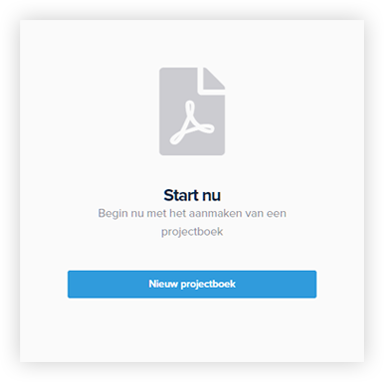
Voor het eerst een Projectboek aanmaken
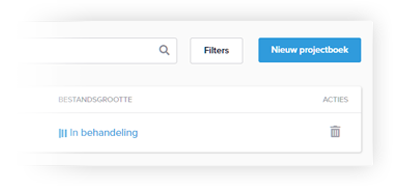
Als u voor de eerste keer een projectboek gaat aanmaken ziet u dit beginscherm. Klik op ‘Nieuw projectboek’ om te starten.
Live voorbeeld
Bekijk direct hoe uw projectboek eruit komt te zien. Met de live preview functie ziet u gelijk de opmaak in beeld.
Inhoudsopgave
U heeft geen omkijken naar de inhoudsopgave, deze wordt namelijk automatisch gegenereerd naar aanleiding van het aantal brandwerende oplossingen en bijlagen die u toevoegt.
Project- en contactgegevens
Hier kunt u de gegevens van het project, de opdrachtgever en eventueel wie het beheer en onderhoud verricht invullen. Als u de gegevens al ingevuld heeft bij het aanmaken van een project in de Datamanager dan kunt u deze eenvoudig kopiëren door projectgegevens te koppelen. Mocht u de gegevens niet willen tonen in het Projectboek dan zet u de toggle ‘Tonen’ uit.
Oplossingen
Voeg hier de brandwerende oplossing(en) toe die u heeft samengesteld en opgeslagen met de Multiselector in uw Favorieten. Voor het toevoegen van de oplossingen uit de Multiselector drukt u op de button ‘Voeg oplossing(en) toe’. Klik hier voor meer informatie.
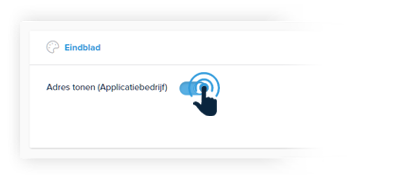
Eindblad
Door de toggle aan te zetten kunt u kiezen om uw eigen adres te tonen op de achterkant van het Projectboek. Dit adres wordt overgenomen uit de bedrijfsgegevens van het hoofdaccount. Tevens is de kleur van de tekst en kaft aan te passen.
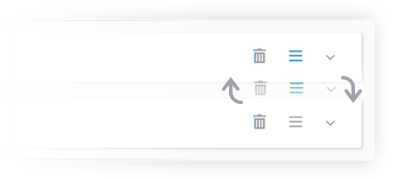
Volgorde aanpassen
Maak zelf de juiste indeling door de tabs te verslepen.
Eenvoudige bediening
Klik op de ‘toggle’ om deze aan en uit te zetten.
Multiselector oplossingen toevoegen
U kunt de oplossingen die u heeft samengesteld met de Multiselector gemakkelijk toevoegen aan het Projectboek. De oplossingen moeten dan wel opgeslagen zijn in uw Favorieten.
Brandwerende oplossing toevoegen
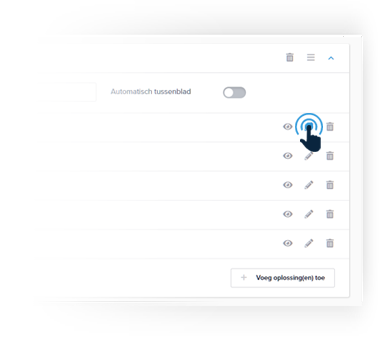
Als u eerst een tussenblad wil, voordat de Multiselector oplossingen getoond worden in het Projectboek, zet dan de toggle ‘Automatisch tussenblad’ aan.
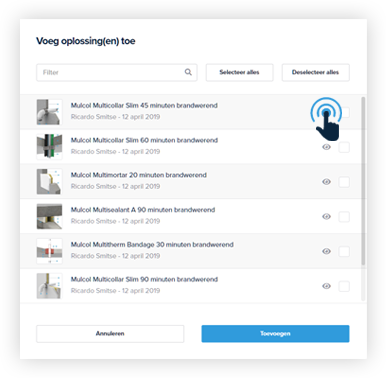
Door op de ‘Voeg oplossing(en) toe’ knop te klikken opent er een pop-up venster waar u de Multiselector oplossingen eenvoudig kunt terug vinden die u toegevoegd heeft aan uw Favorieten.
Zoek de juiste brandwerende oplossing
In de zoekbalk kunt u ook op naam filteren. Start met typen in de zoekbalk en de oplossingen die een overeenkomst hebben verschijnen in het overzicht.
Selecteer en Deselecteer alles
Selecteer of deselecteer alle oplossingen in één keer.
Voeg oplossing toe
Selecteer de oplossing(en) die u wil toevoegen aan het logboek en klik op de knop ‘Toevoegen’.
Overzicht van toegevoegde oplossingen
Onder de tab Oplossingen staan nu de gekozen brandwerende oplossingen die worden ingeladen in het Projectboek. U kunt de oplossingen hier ook nog bekijken en eventueel de naam aanpassen of verwijderen uit het Projectboek.
Bekijk gekozen oplossing
Om de oplossing eerst nog te bekijken voordat u het Projectboek genereert kunt u op het ‘oogje’ klikken.
Naam oplossing aanpassen
Pas de naam van de oplossing aan door op het ‘potloodje’ te klikken.
Blad toevoegen
Om een extra tussen-, bijlage- of oplossingenblad toe te voegen klikt u op ‘Blad toevoegen’ rechts bovenin of op de button rechts onder het Eindblad.
Tussenblad
Met het tussenblad creëert u een nieuw hoofdstuk. De titel die u invult wordt automatisch weergegeven in de index van het Projectboek. In tegenstelling tot het automatisch toevoegen van tussenbladen bij ‘Oplossingen’ en ‘Bijlage(n)’ heeft u hier de mogelijkheid om extra tekst toe te voegen door het veld ‘Beschrijving’ te benutten. Ook hier de keuze voor geheel eigen stijl door een blad- en tekstkleur te kiezen.
Bijlage
Heeft u zelf nog documenten, foto’s of andere informatie die u graag wil toevoegen aan het Projectboek? Kies dan voor het toevoegen van een bijlage. Voeg eenvoudig bestanden toe vanuit de Bibliotheek in de Projectmanager of vanaf uw eigen desktop.
Oplossing(en)
Heeft het project meerdere bouwdelen of bouwlagen? Zorg voor een overzichtelijk Projectboek en splits uw brandwerende oplossingen op. Dit doet u door een extra ‘Oplossing(en)’ blad toe te voegen.
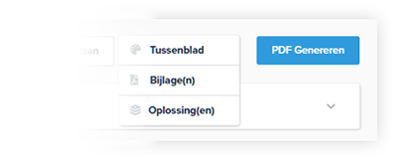
Extra blad toevoegen
Klik op ‘blad toevoegen’ en maak een keuze uit de mogelijkheden.
Opslaan, delen en wijzigen
Het Projectboek kunt u gemakkelijk opslaan, downloaden als pdf bestand of direct versturen via e-mail. Mocht u toch nog iets willen wijzigen in het Projectboek dan kunt u dit te allen tijde doorvoeren.
Projectboek opslaan en delen
Als u klaar bent met de opmaak van uw Projectboek dan kunt u deze opslaan en generen als pdf. Dit kan enkele minuten duren, afhankelijk van de grootte van het Projectboek.
Zodra dit proces klaar is kunt u het Projectboek als pdf bestand downloaden naar uw desktop of kunt u het direct doormailen naar uw contacten.
Projectboek wijzigen
U kunt het Projectboek op ieder moment wijzigen. Houd er dan wel rekening mee dat het eerder gedownloade of gemailde Projectboek niet meer up to date is.
In behandeling
Het generen van de pdf kan enkele minuten duren.